September 29 2026
 5 min read
Welcome to Part 2 of our guide to proper industrial pump commissioning.
While every install and site differs in some way, we wanted to provide as thorough a guide as a generic article can. In Part 1, we covered the pre-arrival essentials—from concrete base and certified rigging to documentation and pipework prep.
This two-part series is aimed at giving site management an overview and competent installers a reminder – if in doubt, reach out. Atlantic Pumps can advise on pump related issues and also handle the install for you if required.
Your new pump has arrived!
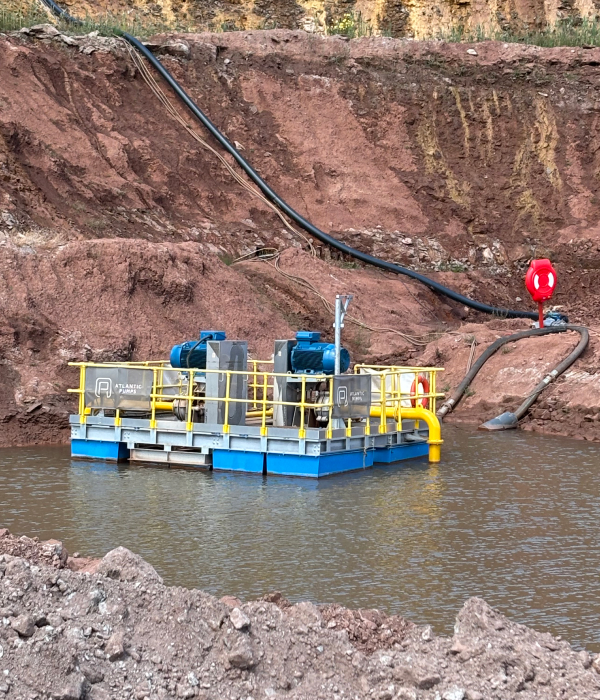
Now, the pump is on site and lowered onto its footprint. Whether you are installing a heavy-duty Audex submersible into a quarry sump or bolting down a slurry pump on a skid, the next few hours determine your equipment’s working life. Skipping steps here leads directly to premature seal failures, overheated bearings, and unwanted downtime.
Here is your practical 6-stage checklist to take the pump from mechanical placement through to live handover.
1. Pump positioning
Submerged pumps are usually suspended from a davit or chain (Audex are fitted with top rings for this),or slid into position via a sliding rail. Heavy dry-sited pumps need positioning as near as possible to the source supply to provide best efficiency, and to keep pumps that are positioned above the source level within their suction-lift limits.
Dry-sited pumps should be fixed to a firm, level foundation. Use packing shims to fine-tune the level and eliminate ‘soft-foot’.
2. Eliminate pipe strain and check alignment
Never force pipework into place using flange bolts. The pipe system must not transfer external stresses or deadweight onto the pump casing. Ensure flexible bellows are installed so pipework carries zero load into the pump casing.
Never suspend or position a submersible by pulling on the power cable or discharge hose; always use certified chains on rated lifting lugs.
Flexible joints should also be fitted where necessary to isolate vibrations. For baseplate-mounted pumps, always verify laser alignment after all pipe connections are torqued down.
Laser check the alignment between motor and coupling in case the unit has been twisted in transit or during placement.
3. Confirm mechanical free-turning and lubrication
Always isolate power before touching rotating assemblies. Check the pump assembly is clear of debris, tools and transportation packaging/locks. Rotate the pump shaft manually to confirm there is no binding, internal rubbing, or debris. Check all fluid levels: gearbox oil, bearing housing lubricant, or glycol lubrication fluid (for peristaltic pumps) must sit at correct operational levels before startup.
Check the system (not just the pump) by walking the entire line. Check valve positions are correct, pipework is supported, connections are tight and rotating/moving components are guarded.
4. Pre-startup power checks
Check insulation resistance and all electrical connections and take readings with a multi-meter to check power supply.
Check that any sensors are wired correctly, making sure dry-run cut-outs (such as the trip on peristaltic/ATEX lines) or leak detectors are tested before energising.
5. Bump the pump: Check rotation direction with an uncoupled motor
Incorrect wiring of the terminals on a 3-phase pump can cause reverse rotation. Running backwards will cause centrifugal pumps to deliver poor head and flow while risking unthreading the impeller.
Ensure the mechanical team leaves the coupling disconnected or removes the drive belt; 3-phase motors must be bump-tested uncoupled on commissioning day to confirm rotation before mechanical drive/impeller engagement. Ensure rotation matches the directional arrow before engaging the drive.
6. Fully prime and vent the suction line
Centrifugal and progressive cavity pumps should never be run dry. Ensure suction valves are fully open, air is bled from the casing, and mechanical seal flush systems are flowing. For positive displacement pumps, check that discharge isolation valves are open and pressure relief lines are live before starting to prevent catastrophic over-pressurisation.
Self-priming pumps will only require the reservoir to be filled for the first time. Standard centrifugal pumps that are not flooded-suction will require the whole suction line to be pre-filled.
7. First live start and test of the stop button
When you’re sure the wiring and mechanics are correct, the first start should again be a quick ‘bump’. While you watch the pump, have someone power the pump on and immediately off (testing the emergency stop or interlock can be done at this stage too). This should give you a ‘feel’ for the state of operation.
If there are no noises, vibrations or leaks, run the pump again for a little longer. Note that gland seals will weep fluid as part of their normal operation, but excessive leaking or any leaks from mechanical seals need investigating.
8. Monitor and record initial baseline data
During the first two hours of operation under normal duty conditions, record baseline data: motor current draw across all three phases, suction and discharge pressures, bearing temperatures, and vibration signatures. The amps and volts being drawn by the motor indicate power draw. Compare actual duty point (head pressure and flow) aligns with the expected power consumption shown on the pump’s performance curve. Any unexplained variances warrant an investigation.
If you have discharge valves, record the flow and pressure at ¼ and ½ shut positions. Take care with positive displacement pumps that doing this does not exceed the system’s pressure rating.
In addition to confirming that the pump and system setup is correct for the duty, these initial readings also provide valuable benchmark data for condition monitoring and predictive maintenance.
Conclusion
Long-Term Reliability Starts on Day One
Running through a meticulous commissioning sequence may take an extra hour or two on site, but it repays itself by preventing months of premature wear, unnecessary power consumption, and catastrophic initial failures. Establishing an accurate operational baseline during the first few running hours transforms your routine maintenance from guesswork into reliable, data-led condition monitoring and maintenance forecasting.
Need Commissioning Support or Engineering Advice?
As a customer-focused, responsive solutions provider, Atlantic Pumps supplies everything from bare-shaft pumps to fully built, turn-key pump packages with complete on-site commissioning across the UK. Our field engineers are on hand to support your in-house maintenance teams, assist your M&E contractors, or manage the entire install from start to finish.
Speak to our application specialists: Call free on 0800 118 2500
Get direct support: Contact your dedicated Atlantic Pumps account manager to arrange site visits, bespoke operator training, condition monitoring, or spare parts packages.
We also take a sustainable approach to our work and are committed to reducing energy waste from pumps. Our expert knowledge allows us to reduce energy usage by 20% on the average site!
Call us today on 0800 118 2500 for more information.